Customer Quotes
Purpose:
The Purpose of a Quote is to allow you to communicate a bid to your Customer what you can do or provide for them and at what cost to them.
How to create, edit, and understand a Customers Sales
Quote.
You can create a new customer order from three different menu locations.
First is from the Graphical Menu System. Click on 'Sales' then 'Quote' Then
click on the button 'Create a new Customer Quote'
Second is from the Menu system across the top. Go to Sales; Quotes; Create new
Quote.
The first main screen that will appear is the 'Select a Customer' Screen
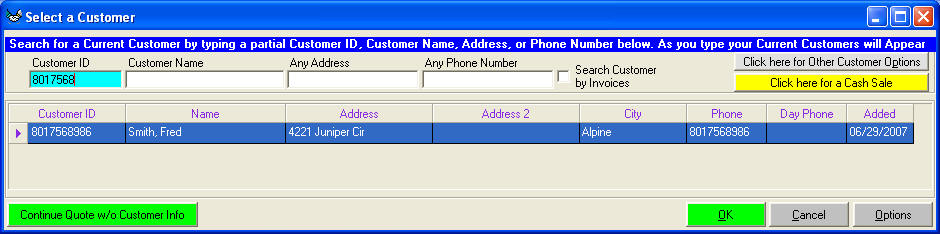
Most popular to use for 'Customer ID' is the Customers phone number. If your
business is in an area that uses multiple area codes you may want to add the
area code to the Customer's Id. As you start to type the customer's phone number
the form will start to appear with current customers.
you can also click on
the checkbox 'Search Customer by Invoices' this allows you to see a list of
invoices instead of the list by customer.
Once you have located your customer you can select them one of two ways.
First click on the 'OK' at the bottom of the screen or with your mouse double
click on the customer row. If you cannot find your customer by the phone number
you may type in the 'Customer Name' textbox just to the right of the 'Customer
ID' textbox. You have two options when you do this. First option is to have
'Search at the Beginning of Customers Name' If this is selected then as you type
'AND' customers such as Anderson,
Andrus, and Andrew
will appear. If you select the option 'Search anywhere in Customers Name'. Then
type 'AND' customers such as Anderson,
Landsford, and 'Brand
Source' will appear. This is great for searching for customers by their first
names.
If you find your customer then click 'OK' at the bottom left of the screen
This Pre-Sale screen will appear.
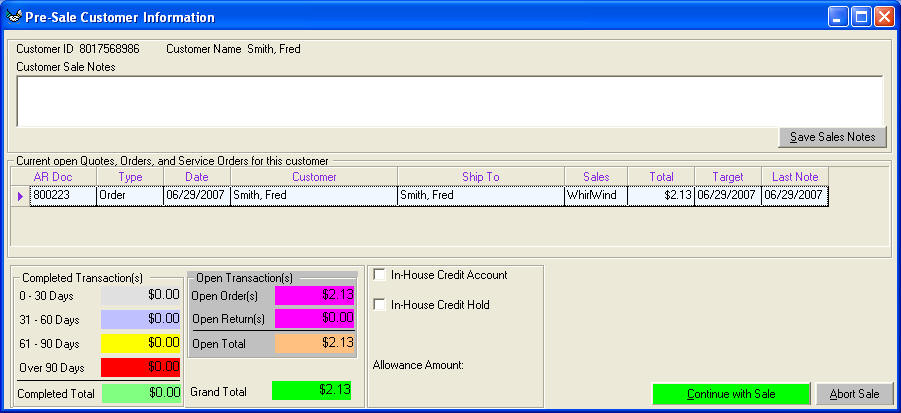
The purpose of this screen is to provide critical information to the sales
staff. 'Customer Sale Notes' can be used for builder allowances, or maybe you
just do not want to ever sale to this customer again. This screen also displays
the open transaction, Completed Transaction amounts, and Open Transaction
amounts. Also shows if the customer has in-house credit.
If you do not find your customer in your database, then this box will appear.
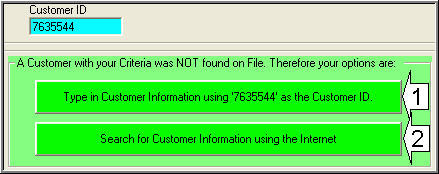
Button '1' will allow you to type in the customers information just like all
Point of Sales softwares.
Button '2' will allow Internet Handshake technology to connect to Yahoo.com and
with the customers name, and zip code WhirlWind Software will pull the customer
information from the internet. Great for collecting correct addresses.
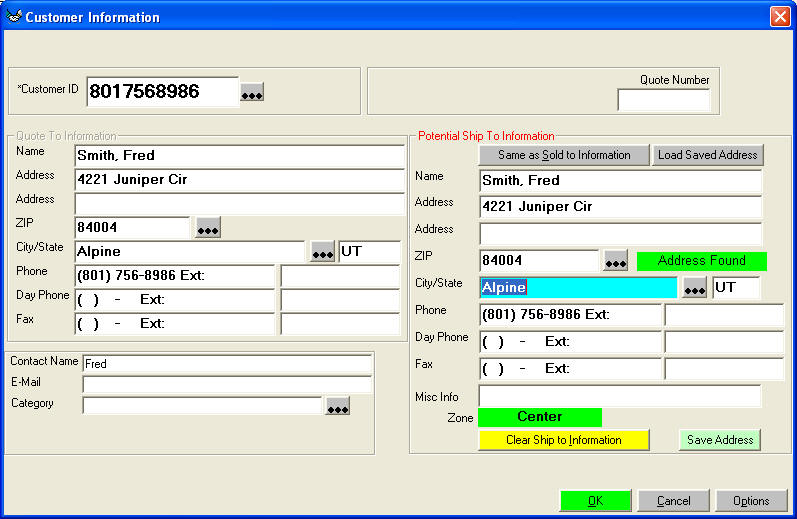
If this is a new customer this screen first appears and only the 'Customer ID' field will be filled in.
Fill in the all textboxes with your customers information. If your customer
already existed in the database your left side of information will be filled out
for you. If you are going to deliver to the same address,
with your mouse click on 'Same as Sold to Information'. If the Ship to
information is wrong click on 'Clear Ship to Information' and type in the
correct information. When you enter your address the 'Address Found' just below
the 'Ship To Information' will show the results of the WhirlWind system asking
Google Earth if your address is a legitimate address.
'Order Number' at the top left of the screen, leave this blank and the computer
will produce the Order number for you. If you have a need to enter your own
order number, enter it at this time. The computer will check to see that it is
available and if so will use the order number provided by you.
'Misc Info' is a field you may use anyway you want. Some customers use it for
Nextel numbers.
You now have who you are going to bill and where you are going to deliver there
for click 'OK' at the bottom left of screen to continue.
Because many of us in this industry use one computer terminal for multiple
sales people, this screen will appear next
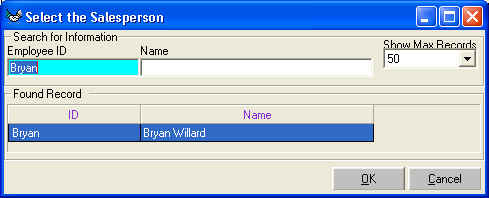
The default salesperson will be selected by who is currently logged on to the
system. If the salesperson name is 'Sally' type in 'S' and Sally will appear.
Double click on Sally or click on 'OK' at the bottom left of the screen to
select the salesperson.
The next screen to automatically appear is this screen
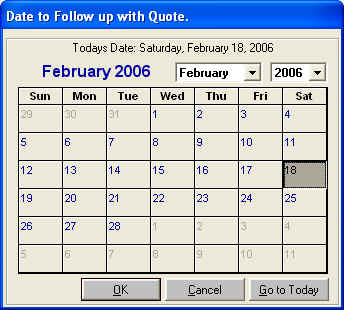
'Date to Follow up with Quote.' this will remind you to contact your customer if
you do not hear from them.
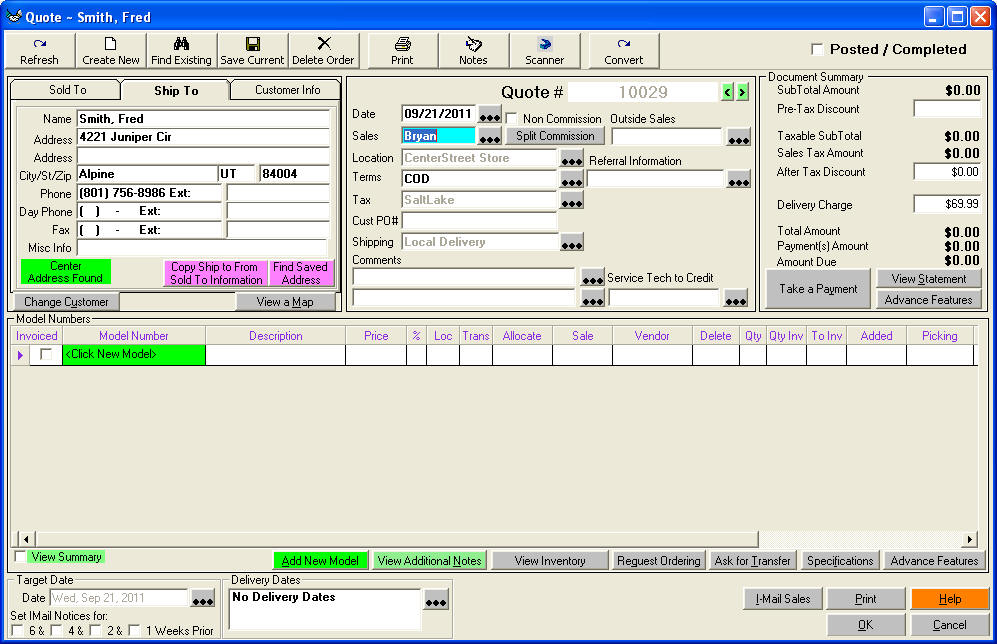
This is the Main Screen of a Customer Quote .
In the top left section is the 'Sold To', 'Ship To', and 'Customer Info'. The
'Sold To' information cannot be changed from a customer order. It must be
changed by an employee that has rights to Save Accounts Receivables. The reason
for this is to keep an old customers information getting changed to a different
customer. In versions prior, a salesperson could change this information. Our
company had a salesperson change a customer that owed the store $18,000 plus to
a new customers information. One week later we sent out Customer Statements.
This new customer received a statement saying she owed $18,000 plus, needless to
say she was not happy. 'Customer info' show how much this customer currently
owes you and the status of the in-house credit requests.
The command buttons in this section are:
| 'Same as Sold To Information' |
Allows user to quickly copy the
'Sold To' information into the 'Ship To' section. |
| 'Change Customer' |
Great tool for allowing a
salesperson to change the current 'Sold To' customer to a different
customer without losing any information about the quote. |
| 'View a Map' |
With Internet Handshake technology
you can simple click here to view a map of the customers address. |
In the top middle section you can add additional information that is
important to the Order:
| Date |
This is the date that the Order
was created. When an invoice is created then the invoice will be dated the
date that it was invoiced. |
| Sales |
Enter the salesperson who will
receive commission or credit for this sale. |
| Location |
This tells the Financial
Statements what store to give credit to. |
| Terms |
This is the payment terms that you
will provide to your customer. |
| Tax |
Tax is the tax group that you will
collect from the customer |
| Customer PO # |
Use this field when your customer
wants to track their invoices by their purchase order number. |
| Shipping |
This is where you enter how you
and your customer agreed upon how they will receive their merchandise. |
| Comments |
This comments are used to express
any short comment that you want to your customer. It will print on the
customers printed copy. You can setup predefined comments, and then click
on the three dots to the left of the comments to select a predefined
comment. To save your own predefined comments, go to the menu system along
the top to Setup; Sales; Order Comments. |
In the top right section is the 'Document Summary'
this deals the the money part of the customer quote.
The only input that this section can receive is 'Pre Tax Discount', 'After Tax
Discount', and 'Freight'. Most companies setup a model number called 'Delivery'
for their delivery charges instead of using 'Freight'.
The command button 'Take a Payment' is disabled for
quotes. The button 'View Statement' allows the user
to instantly see the customer statement.
The button 'Advance Features' is disabled for
quotes.
The middle section 'Model Numbers' allows the user to add, edit, and view the
model numbers and all the information that is important to them. see 'Customer
Order Model Numbers'
In the bottom left of the screen is where the 'Target Date' information is
stored and manipulated.
In the bottom middle section is where you would setup delivery and tell the
warehouse personnel what and when you want merchandised delivered to the
customer.
In the bottom left section of this screen is the 'Print' which will print a
copy to the printer. 'OK' that save your changes and exits the customer order.
'Cancel' which does not save any changes and exits the customer order. 'Help'
which will bring you to this screen.1
Use Target Date
Quote Comments Allows you to enter comments
that will print on the Customers printed copy.
Next Step:
Order