Vendor Adjustments
Purpose:
To make adjustments to a Vendor Account to make it accurate.
How To:
From the Graphical Menu Purchasing
Click on 'Vendor Statement'
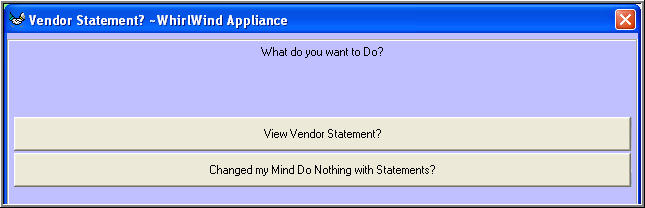
Click on 'View Vendor Statement?'
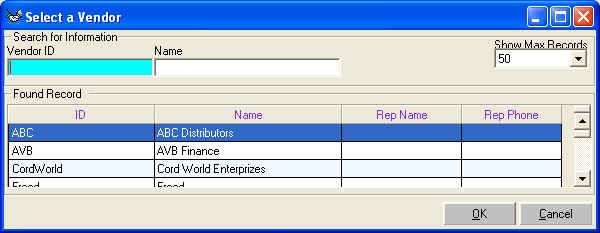
Select the Vendor you want to Adjustment then click on 'OK'

Click on 'Adjust' on the Toolbar of the Vendor Statement
This Screen will appear;
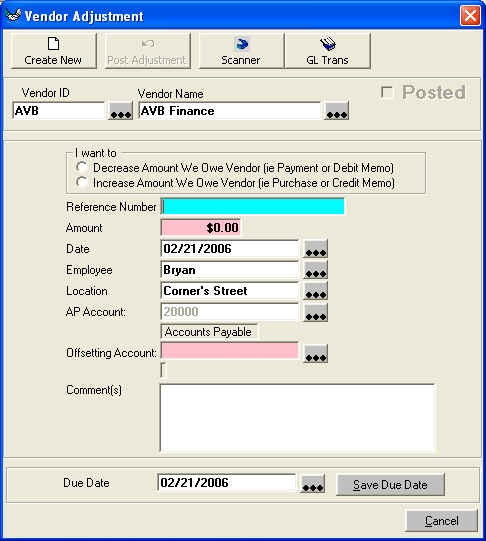
In the Section 'I want to' select if you are going to 'Decrease' or 'Increase'

in the main section

| Reference Number |
The Reference number will appear on the customer
statement |
| Amount |
Enter the Amount of the Adjustment. NO NEGATIVE NUMBERS |
| Date |
Date you want to Adjustment to be Recorded |
| Employee |
Employee creating the Adjustment |
| Location |
This is important for the General Ledger. The AP and
Offsetting Account will be appended to with the Location that is selected
on this line |
| AP Account |
ALWAYS use your Accounts Payable Account Here |
| Offsetting Account |
This is the GL Account that you must select for what you are
making the adjustment for. For example if your vendor is giving you $100
off the price they charged you for merchandise then your Offsetting
Account would be 'Cost of Goods Sold'. There can be many different
accounts for many different reasons. If you have any questions on your
Offsetting Account contact your Accountant. |
| Comment(s) |
This comment can be as long as you want it |
When all the information is answered then click on the Toolbar click 'Post
Adjustment'
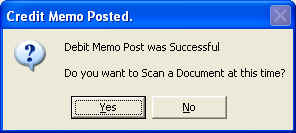
This next screen will appear
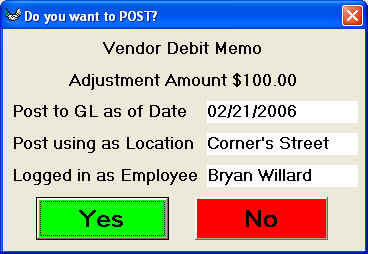
If the information is correct then click on 'Yes'
If you want to make a document imaging copy of your source document then click
on 'Yes' on the following screen
You are now done with the Vendor Adustment.
See Also
Apply Vendor Credits
Apply Vendor Debits