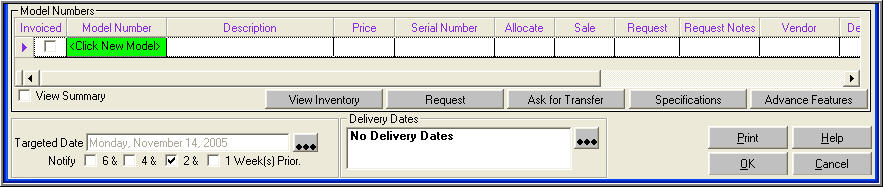
After you have created a customer order, you then must add model numbers. This is the middle of a customer order screen.
Click on the
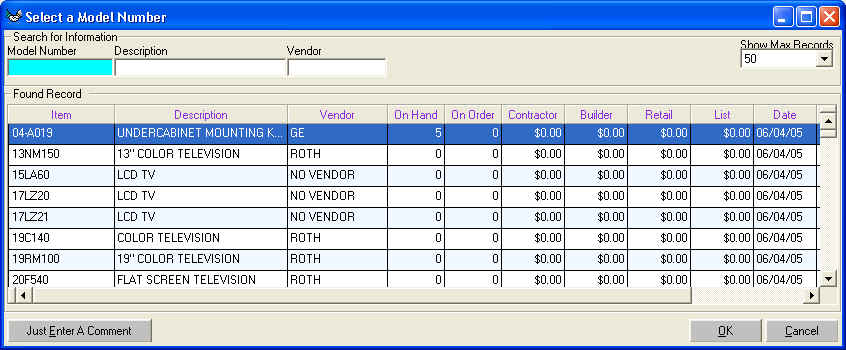
'Select a Model Number' screen will appear. Start to type in the model number you want to add to your customer order.
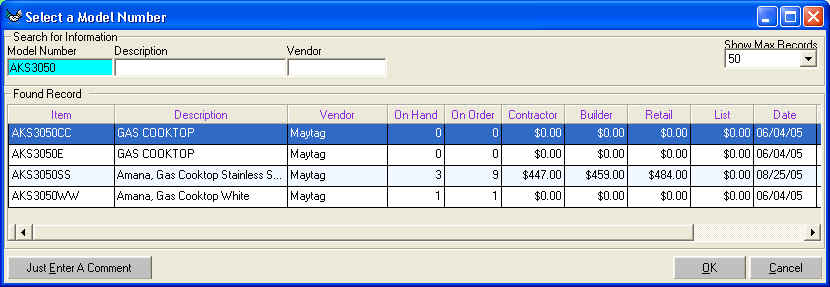
As you type your choices will start to limited to the criteria you have entered. The button 'Just Enter a Comment' will allow you to just enter a comment to your customer without attaching it to a model number. These comments can be as long as you want them to be. If the model number does not exist in the database see 'Add Model to Order not Setup'
At the top right of the screen you will see 'Show Max Records' this is for speed of the system. It is quicker to ask the server for 50 records than all the records that might be available from the database.
Once you have located your model of choice then click on the model number or click on 'OK'.
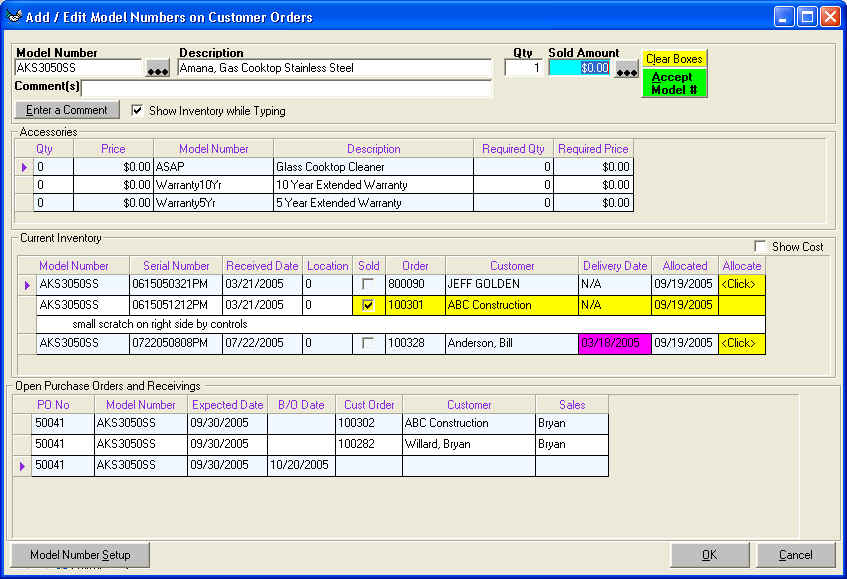
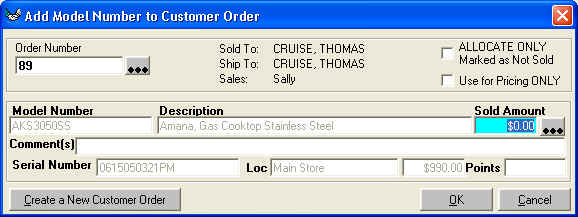
This screen is simple yet powerful. This screen defaults first to the top right on 'Sold Amount'. You can simply type in the sold amount. 'Comments' will allow you to communicate any additional information to your customer such as "Floor Model" or "Rebate ends on Oct 20"

This section of the screen shows any accessories that could be sold with this model number. If you sale Viking, Thermador, or Wolf ranges you could add the island trim, 6in back guard, or 24in high shelf so that no salesperson forgets these items. To add these items to your customer order you would use your mouse to click on the row of the accessory you want to add in the column 'Qty' enter how many. Click again on the same row in the column 'Price' and enter the price you will charge the customer.

This section of the screen will show you the current inventory. It will display the model number, serial number, received date, location of the model. The next columns are for allocation information. 'Sold' column defines if this particular model/serial number must be delivered to the customer that has been attached to the model/serial number. If it is not sold and it has a customer attached this means that we have allocated the model/serial number to this customer but, we may steal from this customer to give to someone else if we could replenish the model/serial number in time to satisfy the original customer. 'Order' is the reference to the customers orders. 'Customer' is the name attached to this model/serial number. 'Delivery Date' is when the model/serial has been officially setup for delivery. 'Allocated' is the date that the model/serial number was attached to the customer. 'Allocate' column allows a salesperson who has rights to allocate inventory to click on the row and allocated a particular model/serial number to the current order. Such as the follow graphic shows
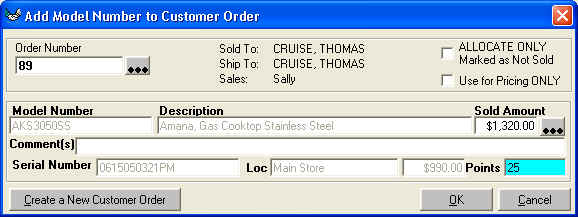
This is the screen that appears when you click on the 'Allocate' column. You can enter a price from here or you can move to the 'Points' textbox and enter 25 and the sold amount will change to 25 percent margin. As you type 25 the 'Sold Amount' will change to $1,320.00. The cost of the model/serial number is $990.00
On the top right corner there are two choices. 'ALLOCATE ONLY marked as Not Sold' will allocate without marking the model/serial as sold. 'Use for Pricing ONLY' will not attach your customer to this current order, but will add the model number at the 'Sold Amount'
